Showing posts with label programming. Show all posts

Tuesday, October 13, 2015

Star Wars Reads Day 2015

Guys, it's been awhile.  It's not that I haven't had interesting library stories to tell, it's just that I've been too busy to stop and tell them.

But I like to document what I've done, and since I don't believe in reinventing the wheel I think it's important that I contribute to the conversation in case someone else out there might be able to benefit from my experience.  So I'm going to try and start this up again.  Bear with me as I try to get back in the swing of things.


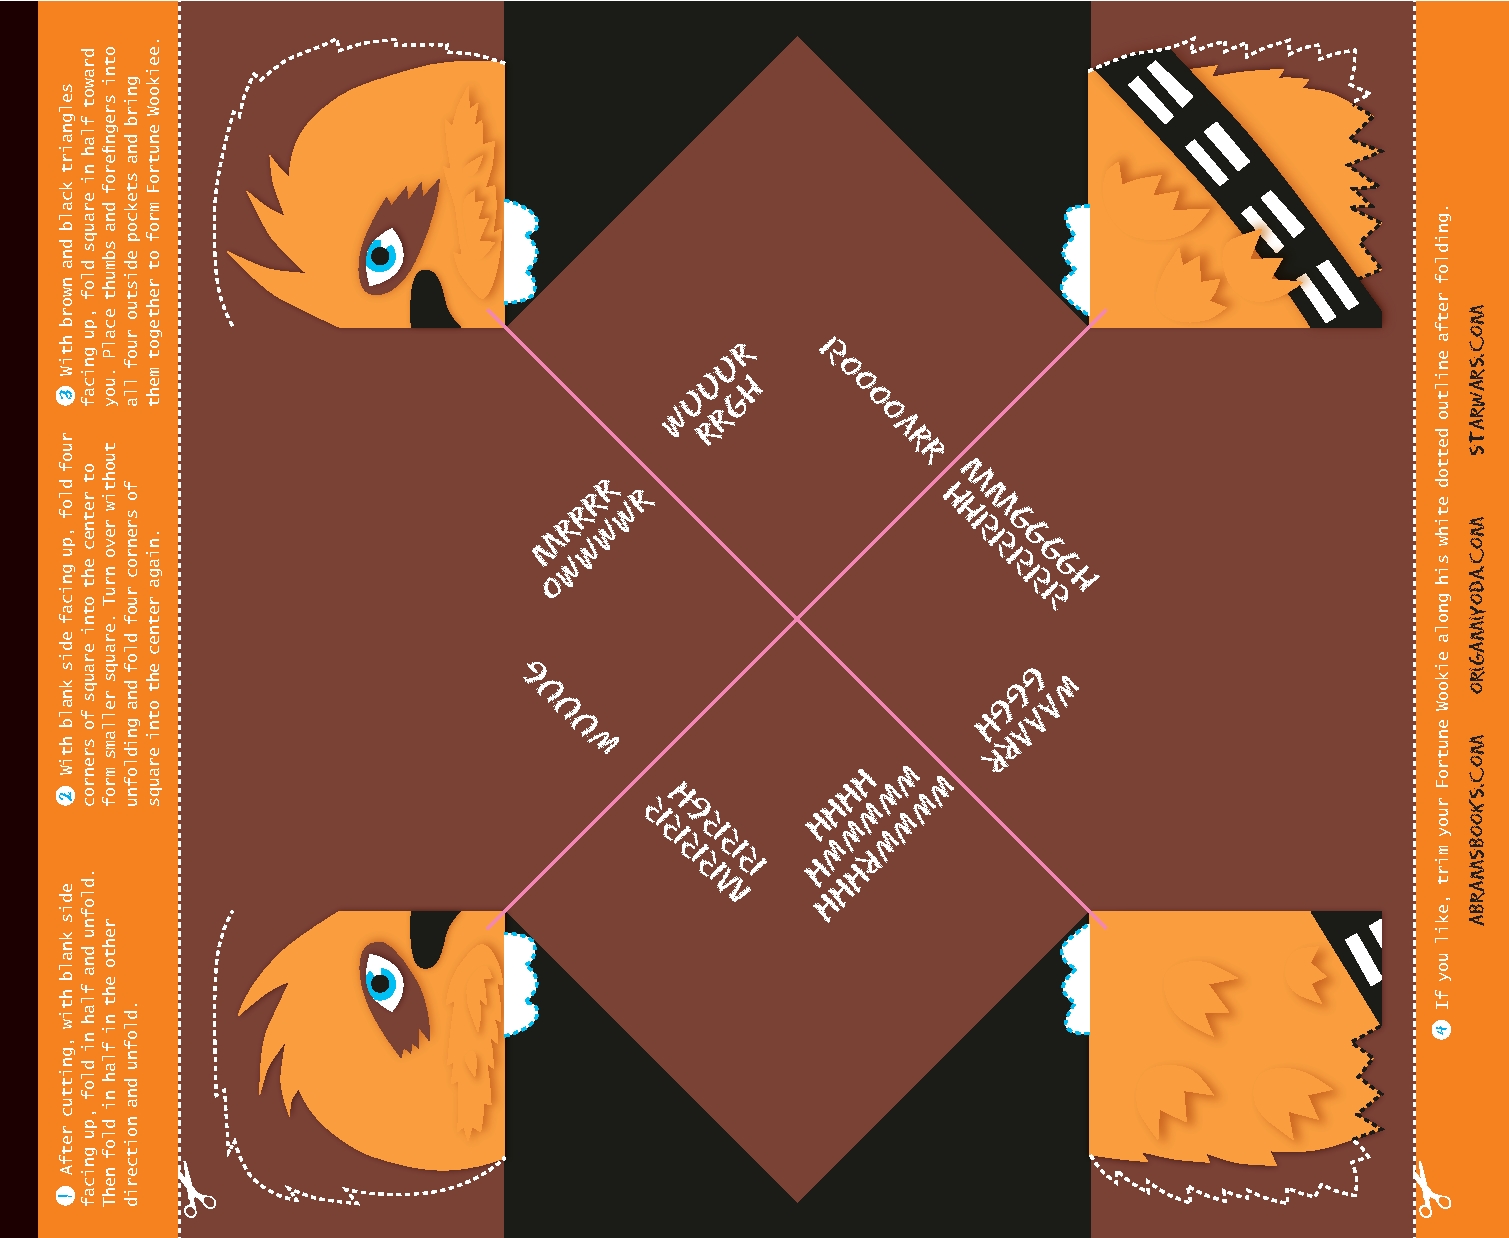
To kick things off, I want to talk a bit about Star Wars Reads Day.  We participated in this awesome national event for the third year in a row, and this was by far our best year yet.  We had huge attendance, which was a bit surprising because the weather was so beautiful and I know we actually lost several families to the pumpkin farm as a result.  Many of the activities were the same ones I had used in years past (balloon lightsabers, fortune Wookies, stick puppets, word search, trivia, memory, and a checklist to keep it all straight), which made planning super easy.  I did revamp an old favorite activity and added two new ones to keep things interesting:

Yoda Ears and Princess Leia Buns 

 
I borrowed this idea from Amy at Catch the Possibilities.  I made my own templates because I wanted to tweak Amy's design and printed the ears and buns off on construction paper.  I also cut two-inch strips of paper that could be fashioned into headbands.  The kids could cut out the ears/buns themselves, and then make headbands.  The Yoda ears were the most popular of the two options, but I was glad to have two different choices for this activity.

Scavenger Hunt


The scavenger hunt has been an old standby for the past few years, and while the kids love it and I love how it gets them to visit all areas of the library, I wanted to change things up a bit.  I borrowed the new format for the hunt from that same blog post that I linked to above and tweaked it just a bit.  I found pictures of eleven different characters and used Publisher to put a letter of the alphabet with each one.  These were cut out, laminated, and hung around the library.  Each kid got a worksheet that listed all of the places where they needed to look to find characters.  When they found the character, they needed to write down the corresponding letter of the alphabet in the appropriate box.  When all were found, they had a message from Master Yoda.  The kids could turn in their completed worksheets and get a bookmark as a prize.

Costumed Characters


This year, thanks to one of our awesome library regulars, we finally were able to get a few awesome members of the local 501st and Rebel Legion to join us for our celebration.  These guys were a big hit!  They spent two full hours in costume hanging out with the kids, taking pictures, watching the kids put on shows with their puppets, and generally just being awesome.  As a bonus, these organizations always advertise through their own outlets where they will be making appearances, so we got a little extra advertising for our event by working with them.  I know of at least two families who came to the library that day specifically because they had seen that the 501st would be there through their Facebook page.

Notes about costuming:

Yes, that's me in the Princess Leia costume.  I like to let my geek flag fly a bit at events like this.  :)

The clone trooper and Sabine (the two characters on the right in the above picture) were my contacts with the 501st and Rebel Legion.  They are parents to one of our long-time library regulars, and dad (the clone trooper) joined up with both organizations last year.  Mom, who is the parent we usually see, just completed her costume and I think might be joining the Rebel Legion in an official capacity soon.  Having people that we know who were already invested in the library as a contact was a huge help!  I was able to talk with our trooper friend before I submitted my request for characters to appear at the library to find out what times work best for people and when other groups were having their events that day to maximize the likelihood that we'd get a good response.  You certainly don't need to have a personal contact like this if you want to try to get the 501st and/or Rebel Legion to make an appearance at your event, but having this personal contact had some nice perks, especially since there are so many local events on Star Wars Reads Day.

Wednesday, October 15, 2014

Star Wars Reads Day 2014

October 11 was Star Wars Reads Day, and for the second year I put together a program at the library to celebrate the event.  After getting some experience under my belt with this program last year, it was definitely easier to put everything together this time around.  Several of the activities that we did this year (the scavenger hunt, trivia contest, balloon lightsabers, and thumb doodle bookmarks) were reused or re-adapted from last year's program which made pulling things together a snap.  I did, however add a few activities to the mix to keep things interesting:

Activities Checklist


One thing that I had noticed at last year's program was that while we had lots of kids come into our main programming room to do our craft projects, many of the kids weren't visiting the Children's Room to look at the Star Wars book display.  This was a problem for me because in my mind, the book display was the main reason for having this event in the first place!  To encourage the kids to come into the Children's Room I did two things:  First, I put a few quieter activities in the Children's room to lure them in.  I also created a checklist of all of the activities (including checking out books!) that kids could try.  Kids who tried at least three activities could also drop off their checklists and be entered into a raffle for some Star Wars books.  This system seemed to work out really well.  Kids wandered around the library looking for different activities to try, and we had a lot more books get checked out compared to last year.

Fortune Wookies


A Fortune Wookie was featured in Tom Angelberger's third Origami Yoda book, The Secret of the Fortune Wookie.  This piece of origami is perhaps better known to most of us as a cootie catcher or fortune teller and in this case is styled to resemble the character Chewbacca.  Angelberger provides a printable template with instructions that kids can use to create their own Fortune Wookies.  I put these out along with some scissors and let the kids go to town.

Star Wars Stick Puppets


I found a PDF full of cute Star Wars printables here.  (Note:  When you follow this link, please scroll down to find the links to download the printables.  Don't use the big green "download here" button at the top of the page!  That's an add for something else entirely.)   One of my favorite activities, which I found in the first pack, was a set of printable, stylized Star Wars characters.  These characters could be cut out and then glued onto a craft stick to make an instant puppet.  I had been looking for another craft that would be preschool-friendly, and this project was a perfect fit since the puppets are very simple to make.  I also set up a table and wrapped it with a "skirt" (actually a couple of big black garbage bags) and encouraged kids to use the area as a stage and put on puppet shows once they were finished.  It took a little bit of prodding to get most of the kids to use the puppet stage, but once they warmed up to the idea it worked wonderfully.  It was super cute, and I like that it encouraged a bit of imaginative play and storytelling.

Star Wars Memory


Do you know how the game of Memory works?  Cards are laid face-down in a grid on a table.  Players take turns flipping over two of the cards.  If the cards match, then you get to keep the cards and take another turn.  If the cards do not match, then you flip the cards face-down again and it's the next person's turn.  Play continues until all cards are matched up, and the player with the most matches wins.

The pack of Star Wars printables that I mentioned earlier also contained the printouts needed for the Memory game.  Just print the sheets on cardstock and cut them apart to make your deck.  If you wanted to you could laminate the cards to make them extra durable, but I chose to skip this step and didn't have any problems.  Since I made two sets of cards, I put a different colored sticker on the back of each set to make things easier for me when they inevitably got mixed up.  I just put the cards out on the tables along with some basic instructions and let families go to town.  One thing that I especially liked about this activity was the way it got kids and parents to really interact with each other, rather than the parents just watching their kids have fun.

Star Wars Word Search


I wanted one more simple activity so I created a word search using this website.  There are lots of free online tools like this, but the thing that I especially liked about this one was that the "words" that I wanted to kids to search for could include spaces, allowing me to have the kids search for full character names like "Darth Vader" and "Han Solo."  I just came up with the words that I wanted included in the puzzle, plugged them into the website, and had it generate the word search for me.  I coppied their generated search onto a Publisher document and then added a few images, a heading, and of course the library's name.  Once I settled on this particular puzzle maker it took me all of about 10 minutes to create the word search.  Easy!


As always, Star Wars Reads Day was a great success.  Our total attendance was actually down slightly from last year, a fact that I attribute to the days' unseasonably warm and sunny weather.  Even if the numbers were down, however, we still had a solid turnout and the kids who did attend all had a great time.

Friday, December 20, 2013

Cookies, Cocoa, and Karaoke

I mentioned in my last post that we had a bit of a Christmas party for teens at the library this week.  The event was called "Cookies, Cocoa, and Karaoke."  Needless to say, the program involved all three of those elements.


I'd had teens asking for a karaoke program for quite some time, and the Christmas season seemed like a good time for this sort of event.  There are many options out there for hosting a karaoke event.  You can rent or purchase a karaoke machine.  There are several video games that have karaoke elements, including "Karaoke Revolution" and "Karaoke Joysound."  Several elements prevented me from using either of these options, however.  Price was an issue was getting a karaoke machine since I just didn't have much money left in my programming budget.  A Wii game, such as the ones listed above, would certainly have been cheaper to purchase and easy to use since we already have a Wii here at the library.  However, I didn't think that any of these games would give us a wide enough selection of songs to choose from.  I also wanted to have Christmas songs available as options for the teens to sing and I could not find a single karaoke game that included Christmas music.

Desperate for a simple solution, I asked around on Facebook and a friend told me that she had once hosted a karaoke event using a program she had found online.  She told me that she had simply hooked her laptop up to a set of speakers and paid a small subscription fee, which gave her access to lots of songs to sing along with.  I looked into several online options like this and eventually selected a program called KaraFun to use for our event.  There is a lot to like about KaraFun and I highly recommend the program to anyone else who is planning their own karaoke event.  The software that KaraFun provides was free to download and very easy to use.  KaraFun also boasts a very large music library of over 17,000 songs, which meant that just about anything that we could think of would be available to sing - including lots of Christmas music.  There was a small subscription fee that had to be paid to allow us to access KaraFun's music library.  I paid $5.99 for a two-day pass, giving me access to the music library for more than enough time for the event.  There is also an option to pay for an ongoing monthly subscription, which would certainly be worthwhile for serious karaoke enthusiasts but was more than we needed for a one-time event.  KaraFun also has an app which can be downloaded onto Apple or Android devices.  In the end I ended up putting the app onto the library's iPad, which gave the teens the freedom to hold the iPad right in front of them to see the lyrics they needed to sing and eliminated the need to set up a more cumbersome table with the laptop.

The KaraFun program worked perfectly for our event.  The teens were pleased with the song selection, and they sang a good mix of contemporary tunes and Christmas classics.  The free software was actually very easy to use and provides users with a surprisingly large range of editing options that allows you to customize the music to your liking.  The feature that I actually enjoyed the most was the ability to adjust the volume in three different areas.  Of course the music's volume could be adjusted.  The impressive part was being able to adjust the volume of the back-up vocals (or turn them off entirely) or turn on and adjust the volume of a lead vocalist.  We ended up turning on the lead vocals but adjusting the volume to make this element fairly quiet.  This gave less-confident singers a little bit of extra guidance as they could follow the lead voice, but keeping the lead vocals quiet made the singer's voice the focal point of the performance.

In the end the equipment that I needed was fairly minimal.  I put the KaraFun app onto the iPad and hooked the iPad up to a large set of speakers.  We also had a wireless microphone hooked up to a different set of speakers, which was perhaps not an ideal sound scenario but was the best system that we could come up with given the equipment at our disposal.  At any rate, none of the teens noticed that the sound was coming from two different places so no harm done.  I had a small book cart available to be used as a stand for the iPad and where the microphone could be set between singers.  Finally, I also set up a laptop to the side of the main stage.  This allowed teen who were waiting for their turn to sing to easily browse the music library and make sure that their songs were available before stepping up to stage to sing.

Of course, there was more to this event than deciding which karaoke program we were going to use!

As the title of this program indicates, there were also cookies and cocoa to be had.  I heated up lots of water in our coffee pot and put out a tub of cocoa mix.  It was really as easy as that.  For the cookies, I actually asked my very enthusiastic Teen Advisory Group if they would be willing to help provide the cookies for this program.  I asked everyone to bring 1-2 dozen cookies to the program.  The three teens from my TAG group who were able to attend complied and there were more than enough cookies to go around.  Asking the teens to bring food is allowed by my library's policies but might not be acceptable at other libraries - be sure to check your policies before trying this.  But the fact that we were able to do this not only meant that I could save some money on snacks, but also that we got to eat some yummy homemade goodies instead of bland store-bought cookies.

The teens also spent quite a bit of time creating Christmas decorations for the party.  We hung up tons of snowflakes and made festive paper chains.  And of course, there was the awesome book tree.   Unfortunately, I neglected to take any pictures of the other decor.  Oops.

In the end I had five teens in attendance for this program.  There was much interest in the program and almost all of the handouts that I had put out were taken.  But this time of year is tricky for a lot of people as schedules fill up quickly and everyone is busy getting ready for the holidays.  I was not too surprised at this fairly low turnout, and I actually wonder if we would have had more success holding this program a week later after Christmas had ended but during the kids' break from school.  The low attendance, however, did have its perks.  We could all be very relaxed about the structure of the program.  I never had to put together a formal waiting list of singers and what songs they wanted to sing, which I may have needed to do with a large crowd.  Instead we could simply use good sense to take turns singing and we could afford to take our time between singers to find the songs we wanted.  A larger audience would certainly have been nice, but there was something to be said for the relaxed nature of a smaller program too.

Fortunately, this was also a very inexpensive program to put together, and an inexpensive program does make one feel better about low attendance.  I only spent about $13 on this program, half of that cost being the rental of the KaraFun music library and the other half being the cost of the cocoa mix.  All other supplies and equipment used were already on hand.  Even if I had needed to purchase cookies to serve for this party, the overall cost would still have been very, very low.

I would certainly plan some version of this karaoke event again for the teens again in a heartbeat.  Now that I know about the features that KaraFun offers and know how to set up the equipment it would actually be a very easy program to plan.  Perhaps we'll see a karaoke event during this year's Summer Library Program...

Thursday, October 10, 2013

Star Wars Reads Day

On October 5 my library was able to participate in the national Star Wars Reads Day event.  The event at my library was one of hundreds of events taking place all over the country, and one of four events in the local two-county area.  It was lots of fun!  The program was fairly well attended, with an estimated 40 children and their corresponding adults in attendance.

Several stations were set up in different areas of the library, each with a different Star Wars activity to try.  The idea was that kids could wander from activity to activity at their own pace, picking and choosing what they wanted to try.

Three crafts were set up in our Community Room under the supervision of a few teen volunteers.  Generally, the crafts took care of themselves and kids could easily complete them on their own or with a parent's assistance.  The teens were mostly there to be the authority figure in the room and offer assistance if needed.

First, we did some Star Wars origami.


I copied the instructions for Yoda, Darth Vader, and R2-D2 from the Origami Yoda books by Tom Angleberger.  These designs are, in the grand scheme of origami, very easy to follow.  Yoda only requires five easy folds to complete, so even very young children were able to create some origami with a little help. No fancy origami paper required:  Angleberger's designs are all intended to be made with scrap paper, so I simply cut colored computer paper into fourths.  Crayons and markers were set out along with the colored paper so that kids could add details to their creations.


The second craft project was taken from the Star Wars Thumb Doodles book published by Klutz.


I purchased a copy of the book and set it out along with some blank cardstock bookmarks (we had some pre-cut left over from a past program, but you could easily cut your own cardstock too), stamp pads, and markers, and wipes for clean up.  The kids were invited to copy the designs included in the book and create their own bookmarks.  They did a great job!


Finally, kids were invited to make their own lightsabers using twister balloons and toilet paper tubes.  I discovered this project here.


This was a super easy project that, while appealing for all ages, was especially well-suited for our youngest attendees.  It was probably also our most popular activity of the day!  Amazingly enough, we didn't have a single popped balloon outside of the Community Room were the lightsabers were constructed.


Outside of the craft room we had a scavenger hunt throughout the library.


Ten different characters were hidden in plain sight in different areas of the library.  Each child was given a worksheet listing all of the places where they needed to look for a character.  When they found the character, they simply needed to write the name of the character next to the location where it was found.  Some of these names were a tad writing-intensive ("Chewbacca" has a lot of letters!), but very young children all had help from their parents if they needed it and no one complained at all about the writing.  Kids who turned in their scavenger hunt sheets to the Reference Desk were entered into a drawing for a few Star Wars book prizes.


We also had a big book display set up in the Children's Room.  Our smaller programming room adjacent to the Children's Room was set up as a special reading area.


I had been hoarding some of these Star Wars books for awhile in anticipation of the display, so I had lots of books ready to go.  The Darth Vader costume came courtesy of one of my co-workers whose son had dressed as Vader for Halloween the year before.  The reading area was not as well used and I would have preferred (I blame some staffing issues that made it difficult to really inform kids that the reading room was an option), but a decent number of books were checked out on the day of this program.  Good thing - the Star Wars book are the whole point of the event!


Finally, there was also an activity for adults.  Our Reference department put together a trivia contest to challenge fans of the franchise.  While the Reference department had adults in mind when they created the contest, they did allow kids to participate too.  Anyone who wanted to play simply had to answer eleven questions.  Most of these questions were multiple choice, but a handful required you to write in your answer.  The person who answered the most questions correctly won a lovely Star Wars prize pack.

All in all, the program was a great success!  Everyone seemed to have a great time.  We had decent number of kids come to the program in costume, which made it all the more fun.  Tiny Darth Vaders, Clone Troopers, Jedi, and Ewoks always make programs more exciting.  I'm hoping that we can participate in the Star Wars Reads Day event again next year - and hopefully get some of the "pro" costumed characters from the 501st Legion to attend as well!

Thursday, September 19, 2013

Star Wars Origami

This is what I did at work not too long ago:

Apologies for the awkward shadows.

Star Wars origami!  From left to right:  Yoda, R2-D2, and Darth Vader.

I've been a bit busy lately planning a program in honor of the second annual Star Wars Reads Day, which will be taking place on Saturday, October 5.  This is a national event with programs taking place across the country.  If you are interested in finding a Star Wars Reads Day program near you, be sure to ask around at our local libraries, bookstores, and convention centers.

The program that I am planning for my library will feature some Star Wars crafts like the origami pictured above, a scavenger hunt, some trivia, and of course a big book display and plenty of space to read.  Watch this space for more info about the program after October 5!

Wednesday, July 17, 2013

Candy Carrot Cupcakes

I'm giving full credit for these adorable little cupcakes to one of my co-workers, who has a way of always going above and beyond what we expect when it comes to the summer book clubs that she runs.


Today our youngest book club met to read and do activities that go along with Candace Fleming's marvelous book Muncha! Muncha! Muncha!  After reading and discussing the book as a group, the kids played Garden BINGO, made rabbit masks, and ate these masterful cupcakes.  Too much cute!

Want to learn how to make these tasty treats?  Check out the recipe here. 

Tuesday, July 16, 2013

Soil Science

Last week I was responsible for another school-age summer event.  Our topic for the week was soil, so I chose to focus our activities not only on dirt, but also on all of the good things that grow in the dirt.

Our first activity was actually a cooking project.  We made dirt cake!  I shared a recipe for this tasty treat in my last post, and while this recipe is decadent it uses more dishes and has a few more preparation steps than I wanted for this program.  Fortunately, there are many different ways to make dirt cake and I was able to track down this simplified recipe.  This version has the added bonus of being served in individual cups, so everyone could easily pick out their own servings.  Everyone took turns with the steps by adding ingredients, stirring, and crushing Oreos for the group.  Everyone spooned the pudding mixture into their own cups and topped it with the crushed Oreos and gummy worms.  We then put all of the dirt cups in the refrigerator to set while we did our other activities.  Everyone got to eat their treats at the end of the program.


Next came our biggest project of the day:  Soil Testing.  Before we got to the testing itself, I took a few minutes to talk about soil pH and the nutrients nitrogen, phosphorous, and potassium and why they are important for gardens.  I also explained that I had used a special soil testing kit to check to see if these minerals were found in potting soil that I had purchased at a garden store.  As a group we made predictions and everyone correctly guessed that the specially-formulated potting soil had a fairly low pH and had more than enough of the essential nutrients.


Then it was the kids' job to run the test themselves on a sample of soil from a co-worker's garden.  The kids divided themselves into four groups, and each group was responsible for testing a sample of soil from the garden for a different nutrient.  My co-worker had actually mentioned that her garden was not producing as well this year as it had in the past, so we expected to find that the garden was deficient in at least one resource.

To do this project, I purchased a simple soil testing kit.  We bought ours at Nasco a couple of months ago when we bought the supplies for my geode program, but these kits are readily available at a variety of other locations as well, including Amazon.  Each group was lead by a teen or adult volunteer, who helped keep everyone on task.  Each group was assigned a different test (one group tested the soil's pH, one tested for nitrogen, etc.) and a corresponding set of instructions on how to test the soil.  As a group we also made a chart that we used to compare the results of their tests with the results of my test on the potting soil.  (If anyone is curious, my co-worker's soil was severely lacking in nitrogen and potassium.)  The kids really loved this project, and I think it really helped that the experiment had actual real-life applications that they could readily understand.


My group of 2nd and 3rd graders took quite a bit longer than expected to complete both of these activities, but the group of 4th-6th graders had time for one last project.  We got some bean seeds started on damp paper towels.  I borrowed my plan for this activity from similar project I had seen on Pinterest (check it out here).  Each kid actually set up two bags (four seeds in each bag).  They were able to take one bag of seeds home to observe directly, and the second bag was left here at the library.  We taped these seeds up in one of our windows and have invited patrons to visit them daily to watch them grow.  It's kind of a nice bonus to have something here at the library that patrons can watch grow and change over the course of the next week or two.


All in all, this was a very successful program.  The kids had a great time, and they got very excited about all three of our projects.  I was very glad to have four good volunteer helpers to guide the kids directly while I floated between groups to help where needed.  I definitely couldn't have made this program the success it was without them!

Monday, July 15, 2013

Dig In, Read In

When I was planning this year's Teen Summer Reading Program, I soon realized that I was going to run out of money in my summer budget.  I found myself looking at the summer calendar with one more day of programming to fill and almost no money for special supplies or a presenter.  I needed a program that would grab attention, but not cost much money.  And given the intensity of a few other programs I had planned, it wouldn't hurt if the program was super easy to plan and put together.  What to do?

Desperate for inspiration, I thought back to other programs that I had seen done and other libraries.  My mind wandered to a previous job and some of the programs I had seen done there.  One program in particular seemed to be just what the doctor ordered.  I'm not ashamed to say that I borrowed this program plan (which had been originally been done with school-age kids in mind) and adapted it for my teen audience.

The idea behind this program is actually pretty simple:  Everyone comes to the program with a book.  Everyone reads silently for a set time (I settled on 45 minutes).  Afterwards, everyone is given a tasty treat as a reward for their effort.  Easy!

One component that I decided to add to this program was a show and tell.  Before we started reading, I gathered everyone in a circle and asked them to each say just a few quick words about whatever the book was they were planning to read.  This way everyone was able to hear about new titles that other teens were enjoying that they might not have otherwise have heard about.  I was actually very impressed with how well my group of teens handled this part of the program.  They did a good job of giving us succinct summaries of their books, and they got excited about talking about books with each other as we moved around the circle.  At one point we actually had a mostly thoughtful discussion about the merits and flaws of Stephenie Meyer's Twilight.  This discussion added about 20 minutes to the program time - admittedly, more time than I'd anticipated thanks to the depth of the discussion and the number of teens in attendance - but it was totally worth it.  After all, it's the library's job to get teens excited about books and reading.  I'd say mission accomplished!

When I first told my supervisor about this program idea, she was skeptical.  She cautioned me that I might not see the attendance numbers I'd prefer in a low-key program like this.  In the end, however, there was no need at all to worry as I had a whopping 19 teens in attendance.  Wow!  I was confident that there would be a market for a program like this in my community, but I truthfully wasn't quite expecting to have this many teens.  Not that I'm complaining.  I'm thrilled that so many people were willing to come to the library simply to hang out and read.

Everyone was also invited to bring pillows, blankets, or whatever else they wanted to get comfortable while they read.  They were also invited to sit anywhere they wanted while they read.  I was pretty impressed that so many teens were excited about curling up underneath one of the many tables that are always present in the programming room.  Who knew?


As far as the tasty treat promised as a reward for reading, I decided that given this year's underground theme I would make some dirt cake.  It was a big hit!  The dirt cake was also the only expense for the program.


I've seen a few different dirt cake recipes floating around, but this is the one I used:


2 (20 oz.) pkgs. Oreo cookies
1/2  stick butter
1 (8 oz.) cream cheese
1 c. powdered sugar
3 1/2 c. milk
2 sm. French vanilla instant pudding boxes
1 (12 oz.) Cool Whip

Cream the butter, cream cheese and powdered sugar together in a bowl, and then set aside.

In another LARGE bowl, mix pudding together with the milk, add the Cool Whip to pudding mixture. (Don’t follow the directions on the pudding, just use the 3 ½ cups of milk).  Then blend in with the cream cheese mixture.

To crush the Oreos, put the packages of Oreos in a large Ziploc bag.  Then, in case of a tear in the bag, just put your Ziploc bag inside another large Ziploc bag for protection, then crush.

Then, in a large bowl, layer the cream and the Oreos.  Start with the Oreos on the bottom of the bowl, then end with Oreos to top it off.  Don't be afraid to go a bit heavy on the cream (or you'll have lots left over) and use a thin layer of Oreos (or you won't have enough).  Chill at least one hour before serving.  Top with gummy worms or other goodies as desired.

Wednesday, June 26, 2013

Underground Engineering Activity

During the summer we set up an activity table in the children's area.  We feature a different activity to try each week, and kids who complete the activity are rewarded with an extra raffle ticket for a chance at one of the big summer reading prizes.  This week our featured activity is a hands-on building project using PVC pipes.


We took PVC pipes, cut them into manageable pieces, and sanded the edges.  We put the pipes into a bin with some connector pieces and asked the kids to put the pipes together to design a plumbing system.  As a way of counting participation in this passive program, we also asked the kids to draw a picture showing us the system they designed, which they could turn in to us in exchange for a raffle ticket.  The kids have really enjoyed this engineering activity.  Some of them would truly spend hours building with the pipes if they could.

Thursday, June 20, 2013

Paleontology and Archaeology Program

This year's Summer Library Program is in full swing, and today I kicked things off with my first school-age program of the summer.  This week's topic was paleontology and archaeology.  Just like last year I actually did this program twice, the first time with a group of 2nd and 3rd graders, and the second time with 4th-6th graders.  Each program lasted an hour and fifteen minutes.

First we took a couple of minutes to talk about paleontology and archeology and what these words mean.  We then segued into a discussion about how exactly fossils form.  We talked about different kinds of fossils:  Molds and casts, as well as petrified bones.  We then conducted our first activity:  Making our own fossils!


I don't know about you, but I recall doing this little project when I was in the first grade.  To make this cast-type fossil, all you need is a plastic cup, a small figure (we used plastic dinosaurs, but truthfully any shape will do), clay, and plaster or paris.  Simply press the clay into the bottom of the cup.  Then press your small figure into the clay, leaving behind an imprint.  It is important that you press very firmly on your figure so that you get a nice, deep imprint.  Then carefully pull the figure out, leaving behind the "mold" part of this fossil.  Mix a small amount of plaster of paris and pour the plaster into the cup.  The plaster will fill the mold and take on the shape left behind by the figure.  Then simply allow the plaster to firm up.  When it has hardened, cut open the cup and remove your fossil.  More detailed instructions for this project can be found here.

The plaster fossils were a great project.  The kids really needed lots of reminding that they needed good, deep imprints to get good fossils.  Making the imprints was really the kids' only job - my helpers and I mixed and distributed the plaster simply to make the process easier with 20 kids in the room.  Since the plaster took time to set, we had the kids write their names on their cups and take the fossils home still inside the cup.  This had the added benefit of preventing accidental breakage.  The plaster was dry by the time this program ended, so there was no risk of plaster spilling in transport.

While the younger group did not have the time needed for this next project, our older group was able to create dinosaur skeletons out of pasta: 


I found instructions for this project here.  However, I did not use the printout included here as I did not want to cut out and assemble the skeleton templates.  I found a different picture of a dinosaur skeleton online (sorry, I don't remember which image I used exactly, so I can't cite it) and it worked just as well.  I also decided in the name of ease to use pre-cut spaghetti instead of fettuccine for the ribs.  I was worried that this project would be a bit childish for the 4th-6th graders, but they were weirdly absorbed in completing this project.

The next activity  was actually a very simple project, but arguably one of the most fun activities of the day.  We did some cave painting! 


 We have big rolls of colored paper at the library, which generally get used to cover bulletin boards.  I took a long length of brown paper, crumpled it up to give it a little visual interest and dimension, and taped it to the wall.  The kids were each given a piece of chalk and they were allowed to make "cave paintings".  It turned out really cool!  I took the finished cave paintings and hung them in other areas of the library after the program ended.

The last activity of the day was definitely the most complicated and involved, but I think it was totally worth it.  I filled a kiddy swimming pool with sand and set up an archaeology dig. 


I was inspired by the project described here and basically ran with the idea.  Instead of using clay pots (which I was unable to locate at a cheap enough price), I purchased plastic vases at the dollar store.  These were painted and then broken into pieces using a vice and a sharp cutting tool.  I buried the pieces in the sand, and basically the kids got to dig them up and reassemble the vases.  I used this activity to also talk about what methods an archaeologist might use and how they might use the information gained from the objects they find to draw conclusions.


The kids seemed to have a really good time with the activities at this program.  In a perfect world I might have done two separate programs - one on archaeology and one on paleontology - but unfortunately circumstances forced me to merge the two topics.  Despite split focus, the kids still enjoyed the activities, and I think that most of them got a feel for what it means to "dig" into the past.

Thursday, May 30, 2013

Grow Your Own Geodes

Last week I geared up for this year's Summer Library Program with a teen program.  We grew our own geodes!

I had found instructions on how to do this project months ago (thank you, Pinterest) as I was brainstorming summer program ideas.  Take a look at the instructions yourself on the Steve Spengler Science website.  This is a very easy science project to do at home since the tools needed are generally easy to acquire.  In fact, most of the supplies are probably already in your kitchen cabinets!  The trick with doing this experiment at the library is that it takes time for the crystals to grow, so we actually had to structure this project as a recurring program where the teens met briefly every day over the course of three days.  Because of this scheduling issue and because I needed to know exactly how much I needed to buy in terms of supplies, I was sure to require registration for this event.  In the end I had seven teens in attendance for this program.

It seems kind of silly to describe the step-by-step instructions when they have already been written out so well (see the link above), so I won't do that here.  But I will post the video - created by and included on the Steve Spengler website - which briefly outlines all of the steps.


Here are a few tips for doing this project with a group:

  • The alum powder is the only ingredient that was challenging to find in the quantities that I needed for a group this size.  You should be able to find small amounts of alum at the grocery store in the spice section (alum is commonly used in pickling), which should be fine if you are doing this project at home with one or two children.  But if you are doing multiple geodes, it makes good sense to buy the alum in bulk.  I was unable to find alum in bulk at local stores, but you can buy it online through multiple sources, including Amazon.  We ended up making a trip to Nasco, an art, science, and education supply company which has an outlet store located in Fort Atkinson, WI (as well as an online catalog).  It is possible that alum may be easier to acquire in bulk locally during the late-summer canning/pickling season.
  • Blowing out the egg, as described in Steps 1 and 2, was a little bit tricky, but it was definitely a lot of fun.  Just be sure to remind the kids/teens to only breathe OUT, not IN, while their mouth is on the egg!  I saved all of the egg innards (waste not, want not), took them home, and made two quiches.
  • To get the water heated to the near-boiling point required in Step 9, we used a simple coffee pot without any coffee grounds.  We have a very large percolator here at the library that we use for meetings, and it was absolutely perfect for this job.
  • We ended up using 24 oz. glass jars as the containers where we mixed the solution and, ultimately, grew our geodes.  These worked fine, but I kind of wish that we had been able to get containers with wider openings to make it easier to drop the eggshells in and, later, fish them out.  Glass measuring cups would have been perfect, but I was unable to borrow enough of these containers to go around.
  • The programming room where we did this project has a sink in it.  While this isn't exactly a requirement for this project, there were a few moments when I was very glad to have the sink nearby.  The teens rinsed out their eggs to better clean them after cutting them open, and we dumped much of the liquid out of the jars before fishing out the geodes with a spoon since the openings were fairly narrow.  This also made doing the dishes very easy.

If you read the comments to this experiment, you'll see that some users complained that their geodes did not grow at all.  Fortunately, we didn't have any problems at all with our geodes!  I truthfully don't know why these users had trouble with their experiments.  We followed the instructions to the letter and everything worked fine.  

And since you've all been waiting patiently, here are some pictures:


The teens had a lot of fun with this project.  I think they really enjoyed the hands-on aspect of this program. Several of the teens also came up with some creative ways to alter the experiment that might yield some interesting results.  It was really neat to watch the gears turn in their brains as they came up with these ideas! Ideas for variations included:

  • Create new colors by mixing the food coloring.
  • Don't add any food coloring at all.
  • Add the food coloring later in the crystal-growing process.  Would the intensity of the color change?  Would the older, deeper crystals be clear, while newer crystals had color?  
  • Crow crystals on surfaces other than eggshells.  What would happen if you were to treat an object with a different shape with the glue/alum as described in Steps 5 and 6?  What if you simply did this treatment to the inside of a bowl?

Most of the teens vocalized an interest in trying the experiment again, either as another library program or on their own at home.  Success!

Friday, April 26, 2013

Library Shouts

Several weeks ago we ordered a book for the children's nonfiction collection called Sneaky Art: Crafty Surprises to Hide in Plain Sight.  Written by Marthe Jocelyn, this book has lots of cute, whimsical crafts that can be pieced together with everyday objects and left behind in certain locations as art. 

As we were paging though the book, one of the projects in particular caught our attention:  Library Shouts.  To do this project, you basically cut out some paper in the shape of a speech bubble and decorate it with words, shapes, stickers, stamps, cutouts...whatever you have on hand.  You then stick the bubble's tail in a book.  The idea is that the speech bubble will draw attention to the book and encourage people to pick it up.

I thought this was a perfect project for my Teen Advisory Group, and my teens agreed.  We changed the format slightly and made bookmarks with a large, oval-shaped bubble at the top.  This shape seemed to provide a bit more stability, plus it fit a bit better in the relatively narrow space between the top of the books and the next shelf.  During this week's TAG group the teens took the bookmarks and went to town decorating them.  We used magazine cutouts (mostly for the sake of mismatched letters), construction paper, markers, and sequins to make our Library Shouts look amazing.  When they were finished I laminated all of the Library Shouts so that they will - hopefully - last a little bit longer.  Then it was just a matter or sticking them inside books that we loved!


We placed all of our Library Shouts in books in the Young Adult area since this is the collection near and dear to the teens' hearts. But theoretically we could use these bookmarks anywhere in the library!


I also was sure to get my library's circulation department on board with this project. My hope is that the circ staff will be able to take the bookmarks when patrons go to check these books out and return them to me so that I can reuse them in other books. I don't expect that we'll be able to keep these Library Shouts forever - eventually they'll get lost or walk away - but we want to be able to use this promotion for as long as possible.